
Have you ever made bread pudding from banana bread? I hadn’t until today.
Walking through the grocery store aisles looking for inspiration, I found a loaf of banana bread and decided to finally try making a bread pudding using banana bread. All I needed were eggs and cream because I already had a banana at home. I also picked up some frozen puff pastry and some jam and a bag of Doritos and some salsa. For not a lot of money, I had a lovely dessert, a snack and something for afternoon tea.
Bread pudding is best made from stale, dry bread but this bread was quite moist so I cut it into cubes and put it in the oven on low heat for about 20 minutes, tossing it once. While the bread was in the oven, I whisked four eggs with some sugar and cream and a little vanilla.
When the bread came out of the oven, I let it cool for a few minutes then tumbled it into a buttered casserole dish. 20cm square (8×8) would work just fine. I poured the custard mixture over the top and let it sit to soak in for about 15 minutes and then into a 180C / 350F oven for about an hour until a knife came out almost clean.
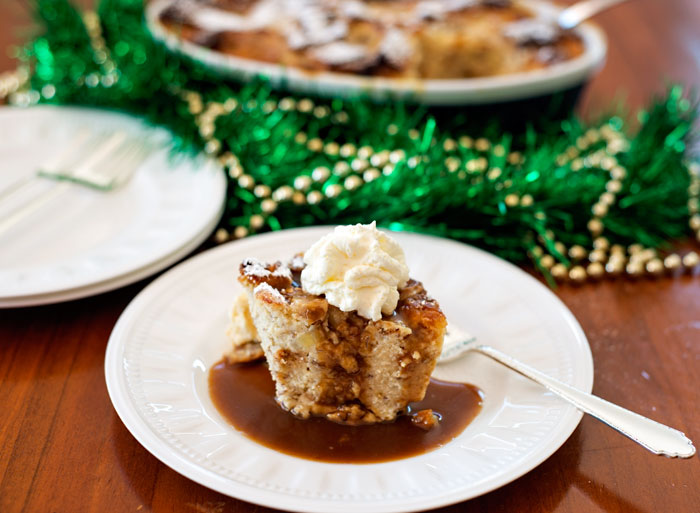
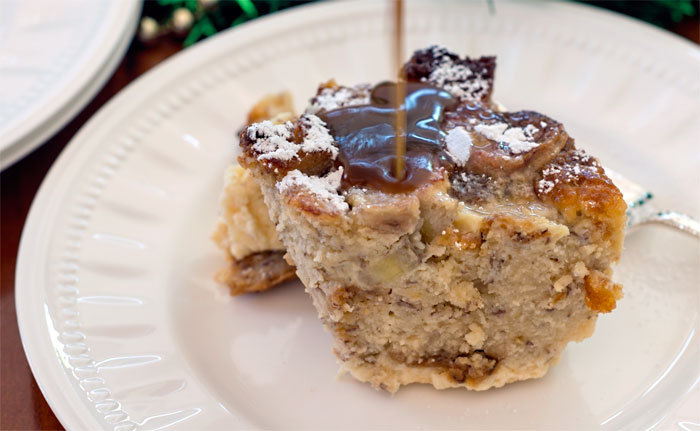
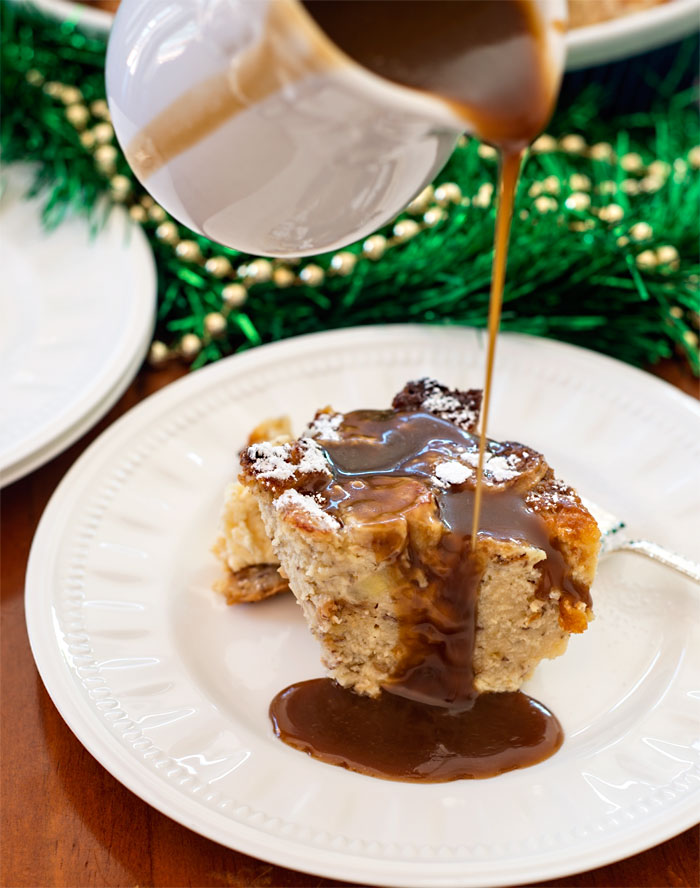
Once it was slightly cool, I dusted it with icing sugar and served it with dark toffee sauce and whipped cream. Over the top? Maybe, but it’s Christmas!
- 6 cups cubed banana bread
- 1 banana - sliced into coins
- 1 teaspoon vanilla extract
- 4 eggs
- 1 cup cream
- 2 cups milk
- ⅓ cup sugar
- 1 tablespoon butter
- Preheat oven to 180C / 350F and generously butter a 20cm square baking dish (8" square)
- Dry bread soaks up the custard better, so if the bread is moist, place on a baking tray at 160C / 320F for about 20 minutes, tossing once. Set aside to cool.
- Add the cream, milk, eggs, sugar and vanilla into a bowl and whisk to combine.
- Tumble the banana bread cubes into the baking dish and scatter the banana slices over them. Pour over the custard mixture and let it sit for 10 minutes before placing it in the oven.
- Bake for one hour until a knife inserted into the center comes out mostly clean.
- Serve warm, dusted with icing sugar and served with warm toffee or caramel sauce and cream.
Puff pastry turnovers are the most simple things to make ever and they look really nice on a plate, especially with a scoop of vanilla ice cream. You can make your own filling from fruit you like or you can use jam or canned pie filling and in less than 30 minutes from start to finish you can be serving something like this.
Preheat oven to 190C / 375F. Lay a piece of puff pastry on a flat surface and divide it into four sections. Place a tablespoon of filling in one corner of each square and pull the other corner over and press to seal the edges. Place on a baking sheet lined with baking paper. Whisk an egg with a teaspoon of water and brush the tops of the turnovers and place in the oven for 20-25 minutes until risen and golden brown. If you want to drizzle with icing, mix 1/4 cup of icing sugar with 2 teaspoons of hot water to make a runny icing and drizzle across the turnovers.

Some might say, why a bowl of salsa and some Doritos for a holiday entertaining? Can’t you come up with something more creative? Okay, maybe I could but at this time of year, why kill yourself getting ready for a party and be so tired you can’t enjoy your friends. Enter a bowl of salsa with chips. It’s junk food we all eat at home from time to time anyway. The last time I served this, the bowl was empty and not a Dorito left.